


Coloring books for adults are all the rage. So much so, it doesn’t look like this phenomenon is going to end anytime soon.
Regardless of the technique you use, coloring is very therapeutic. In fact, some experts indicate this activity provides the “colorer” with the same relaxing benefits as meditation or yoga.. In addition, coloring takes you back to your childhood. What could be better than that?
Coloring involves creativity. That’s where technique comes in to play. The following information covers five different areas, of the craft. This is, by no means, a complete tutorial. But, it’s enough information to get you started. Let the learning begin!
You have several choices, when it comes to coloring tools. They include:
• crayons
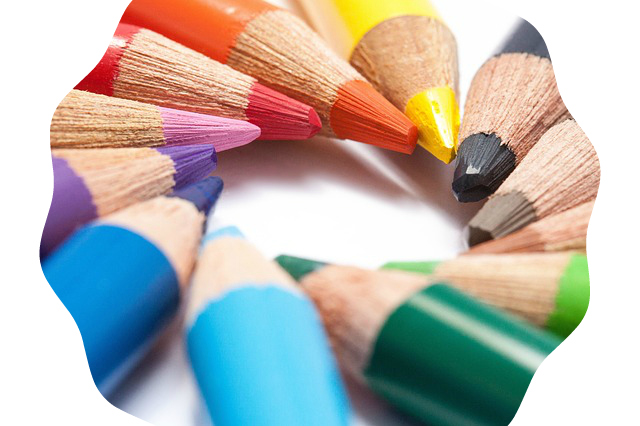
• colored pencils
• gel pens
• fine-tip markers
It’s always a good idea to practice any new coloring technique on plain paper, before attempting it on one of your more expensive coloring books. This way, if things don’t work out like you planned, your pages won’t be won’t be ruined.
In addition, please keep this in mind. Not every medium works with every technique. Markers work better with some things and crayons and colored pencils work better with others. The best thing to do is have fun and experiment. Chances are, you’ll be pleasantly surprised with your results.
Blending Techniques
There are several things you can use to help you blend colors. All of them are very inexpensive. Here are a few of them:
• Water, that’s right… plain old water. It works best when you’re using watercolor pencils. When you finish coloring your page, simply wet a paintbrush and “re-paint” the areas you want to blend.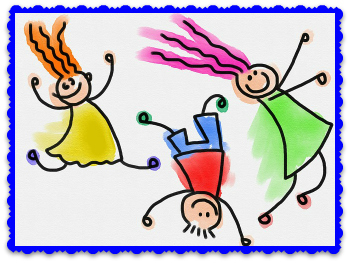
• Nail polish remover is another great blending medium. Some coloring pro’s say it’s their number one choice. Pour a little bit of the remover in the cap. Dip your brush and it and paint over the areas you want to blend. If you happen to be using colored pencils, this is a great way to remove the grooves.
• You can also use an regular eraser to blend colors. A large school-type eraser works best for larger areas. Use a pencil eraser for smaller areas.
• A blending marker is another idea. It works like the blending pencil, mentioned below, by dissolving and blending the color right on the paper. It’s a good idea to use these markers in a ventilated room, because they have a strong smell.
If you’re working with crayons, try using a Q-tip and mineral oil. Dip the swab in the oil and rub it over the colors you want to blend.
Shading Techniques
Shading techniques typically work better with colored pencils. One of the most successful ways to practice is to use two contrasting colors. Use the first color to shade from left to right. Use the second color to shade in the opposite direction. Practice blending the colors together, in the middle.
The way you hold the pencil makes a difference. Position it so that most of the tip is in contact with the paper, which makes the color smoother and helps to reduce the possibility of pencil lines. This is accomplished by holding the pencil somewhat sideways.
Instead of using white and black, to do the shadowing, it’s better to use colors like dark blue and purple for the dark colors. Use light yellows, for the highlights.
Try to avoid rubbing the colors, in effort to create the shading you desire. This has a tendency to smear everything together.
Doodling
When you’re in an artistic mood and there’s no coloring book in sight, why not doodle? Doodling is actually a great way to improve your artistic skills. The more you relax and let your hand do most of the work; you’re on your way to being a “master doodler.”
Learning to doodle is a lot of fun. You can doodle almost anything, even your own image. It’s probably best to start with basic tools like pencils, inexpensive markers or ballpoint pens. Once you start to get the hang of it, you can always graduate to more expensive supplies, including pastels, chalk and paint.
Doodling, as a beneficial pastime, is probably much more popular than you think. Famous presidents, authors and celebrities all admit to doodling, on a regular basis.
For most people, faces are harder to doodle than flowers, animals and other objects. Interpreting your finished doodle depends on whether you draw yourself or someone else. A simple round face indicates you’re probably a happy person. A brooding expression might mean you’re not particularly sociable.
If you’re a beginner, it’s good to practice drawing the same face with different expressions. This way you end up with a more realistic shape, to refer to in the future. If you’re doodling yourself, look into a mirror or at one of your pictures.
When you’re comfortable with the shape of the face, practice drawing features. Challenge yourself to draw an entire page of eyes, noses, etc. You’ll be surprised by how much you learn.
If you don’t want to draw yourself, try doodling a loved one or famous celebrity. You can even get a little crazy and try your hand at a caricature. There’s nothing wrong with a little more silliness in the world!
Gel Pen Techniques with Shading
Many adult coloring fanatics LOVE using get pens to pull off several fun techniques and pretty decent shading. One big benefit of using this type of pen is the fact that the tip stays the same size. It doesn’t change shape like a crayon or colored pencil. Here are two popular gel pen techniques to consider:
Hatching
Hatching is easy-peasy. It consists of a bunch of parallel lines or strokes, which results in a uniformed look. You can use multiple colors and angle the lines any direction you’d like. Crisscrossing the lines, makes it even more interesting.
Stippling
Dot, dots and more DOTS! That’s stippling in a nutshell. Easily change the texture of your drawing by adding
Shading
It’s entirely possible to achieve shading techniques with a gel pen. Yay! However, it does take practice on your part and the blending pen of your choice.
A blending pen, which comes with two tips, is filled with clear fluid. When you draw over a color, with the pen, that color blends into the color or colors next to it. Cleaning the pen is easy. Simply scribble on a piece of paper, until the pen runs clear.
Most artists recommend that you use the gel pens nearest to the outlines of the picture you’re coloring. Then, use the blender pen to draw the color from the outline to the middle of the section you’re working on.
Colored Pencils 101 – Mixing and Layering
If you’ve never colored before or haven’t colored in what seems like a million years, you probably want to start out with the basics and work your way up to “Color Maestro.” Colored pencils are great for this. They’re available a rainbow of colors and a variety of price points, starting out at just a few dollars. The overall cost depends on the brand and quality you prefer.
One of the first rules of basic mixing and layering is practice. It makes sense, right? Like almost everything else, the more you practice, the better you get.
For best results, keep your pencils sharp. This makes it much easier to fill in small areas. Remember, not press too hard. The goal is to build up color and not continuously break the tip of the pencil.
One important secret of successful layering and blending is coloring on the right texture of paper. You want something with a fine texture, as opposed to a smooth surface. The texture holds the pencil, which allows you to add multiple layers of color.
The second part of good layering has to do with the colors you choose. Always use complementary colors when blending to create shadows. It’s recommended you never use a black pencil for shading. Doing so, makes the shading look dull and flat.
Complementary colors are those that are situated on opposite sides of the color wheel… shades of violet-blue and yellow, orange-red and cyan, green and magenta, etc. Always start out with a light color. If you start with a dark one, you won’t be able to see the lighter one.
Colored pencils are one of the most preferred coloring tools because they layer so well. It’s not uncommon to apply three to five different layers, to create a whole NEW color. How cool is that?
In case you’re not aware, these pencils are waxy. When you press too hard, your colors end up shiny. If this happens, you won’t be able to build up layers. Use even strokes and a light to medium touch.
Adult-related coloring certainly isn’t anything new. In fact, Psychiatrist Carl Jung, began prescribing “coloring therapy” to his patients in the early 1900s. The calming effect (of this activity) stems from temporarily occupying the logical part of the brain, involved with fear response. In other words, you’re giving your amygdala nuclei a rest.
As the nationwide trend continues to grow, adult coloring books are popping up all over the place including high-end department stores and catalogs. Small town artists are making names for themselves and earning extra income, at the same time.
Have you ever heard of a “coloring club?” Picture yourself relaxing with a bunch of friends, enjoying yummy food and drinks and coloring the picture of your choice. Yes, new groups are forming every week. No professional art experience required.
This is the tip of the iceberg, in regard to the wonderful and expanding world of adult coloring. As you can see, it’s never really been a “kids only” activity… even though many grown-ups secretly disagree.
If you’re not sure coloring is for you, there’s absolutely no harm giving it a try. Chances are, not only will it be enjoyable, it’ll be addicting too!
The Art of Coloring for Stress Reduction
May 18, 2016
TELL ME MORE!
wanting to be their own self-care advocate
JOIN WOMEN JUST LIKE YOU AND FROM ALL
DIFFERENT BACKGROUNDS, SHARING ONE THING IN COMMON:
JOIN WOMEN JUST LIKE YOU AND FROM ALL DIFFERENT BACKGROUNDS, SHARING ONE THING IN COMMON:
JOIN OUR MONTHLY
MEMBERSHIP
Craving more connection?

CLOSE
